Cactusleak
De oplossing voor lekke banden!
-
Tubeless conversion guide
Setting up Tubeless tires is still being seen as complicated by many people,
However in these few steps we make sure you will get the job done with ease.
Getting your bike to run Tubeless is one of the best upgrades you can make to your bike, They will be more resistant to flats a 30% increase of grip and you’ll lose some weight.Tools needed:
- Air Compressor or Tire Booster (track pump)
- Scissors
Materials needed:
- Cactus Leak tubeless conversion kit
- Degreaser
- Tubeless (ready) Tire
- Tubeless compatible rim without dents
Step 1
Remove your wheels from your bike, Now remove you tires tubes and rim strip.
The rim now has to be cleaned and degreased so the tape will stick nicely.
Make sure you use the right tape with this is easy to be measured as following :
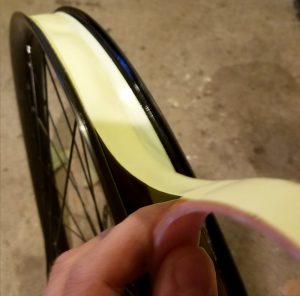
If the inner width of you rim is 25 mm you use 25 mm width tape or the closest one possible.Start putting the tape on 10 cm in front of your valve hole and make sure you pull it in tight and straight while you run it around your rim, tape till over 10cm of the valve hole again and cut it off. Now that the tape is one you’ll want to press down the middle all around so the tape is all the way connected with your rim.
Step 2
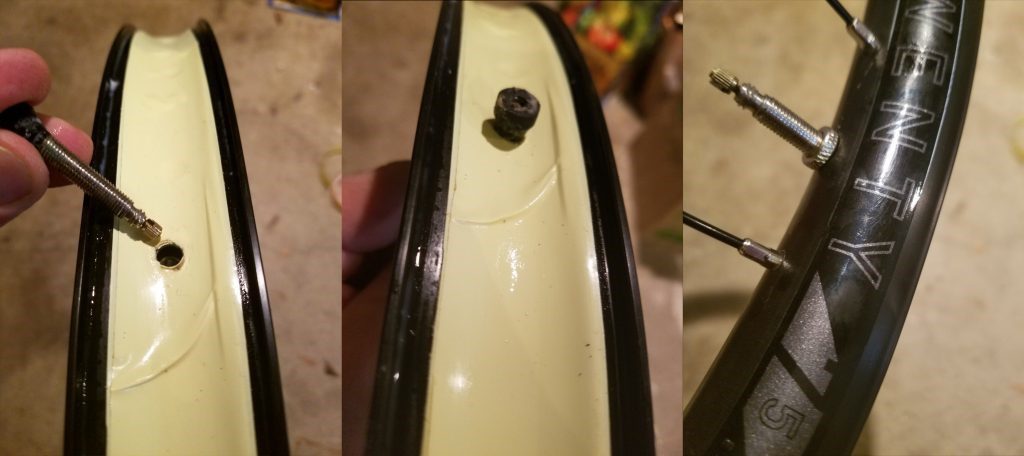
Installing the valve by piercing the tape with the valve and tighten the nut so the rubber of the valve closes down the rim/tape as shown on the image.
Step 3
It’s now time to seat the tire on the rim, this works the same as normal but just without the tube. Start by installing one side of the tire on the rim, this way you can easily add the sealant witch we do in the next step, in or just put it all the way on but try to not use a tire lever as this could damage the rim tape.
Step 4
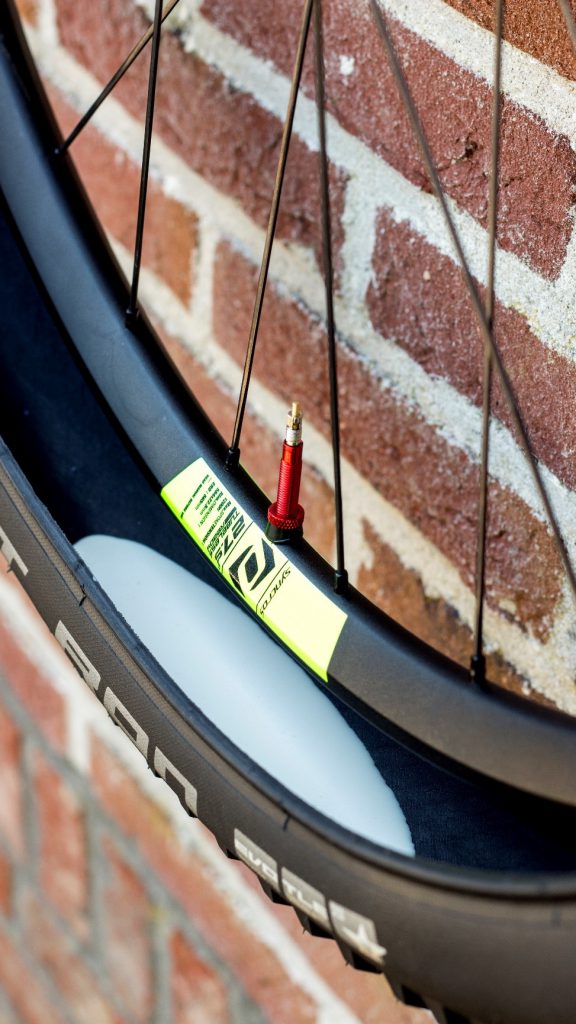
Adding the Cactus leak tire Sealant.
Adding the sealant is possible multiple ways, as mentioned in the last step you can add the desired amount in the tire while its sitting on you rim one side, or you could choose to inject it into your valve by removing your valve core. Most important thing is that you do not forget to shake your bottle of sealant well. Add the sealant as shown below and mount tire fully.
Amount of sealant a tire:
Race : 40/60ml
MTB: 60/100
Step 5
Airing it up
Make sure you tire is seated well on your rim and that you valve is in between the tire walls, Try to hang you wheel up as this makes it easier. Hook your track pump up and start pumping it up by starting real hard and fast, now it might start leaking once it inflates but don’t let this stop you as this will stop once the tire is on full pressure. Does this not work for you? In this case you are going to need a compressor witch can inflate the tire way faster so it will come up. Do not exceed the maximum pressure as stated on you tire or it will blow of and you will be all covered in white..
Once the tire is on make sure it came out all the way, if not you can try flexing the tire to the left and right on the spot and see if it ‘ pops’ if this does not work you can deflate the tire and but a lubricant in between, like silicon spray.
If its inflated spin your wheel to make sure the sealant has closed every last leak and your good to go, the best thing to do is to go for a ride straight away so the sealant will stay active and closes everything for a 100%. If you don’t the change that your tires lost a lot of pressure after a day, now worries just inflate in and go for that ride.